In the last post I gave an overview of straight line machine quilting on a regular sewing machine with a Walking Foot installed and the feed dogs up. In these next two posts, I will attempt to clear up the confusion between free-motion quilting and using the free-motion quilting technique for free-hand or following a marked line quilting.
Today’s post will introduce you to the technique of free-motion quilting and cover the first option for using the technique to stitch formal patterns.
Formal is a phrase I coined for a style of free-motion stitching when patterns are formed by following a marked line (more below). First, let’s cover a few instructions for setting up the machine, and the attachments used for the technique; then you will learn about the two styles of stitching that can result when using free-motion quilting techniques.
 |
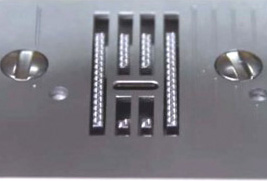 |
Free-motion Machine Quilting happens when the layers of a quilt are stitched together using a sewing machine with the feed dogs lowered and a free-motion foot or darning foot installed. These photos show a regular sewing machine that has been set up for free-motion stitching; an open-toe free-motion foot has been installed to replace the regular sewing presser foot and the feed dogs have been lowered. When the feed dogs are lowered, they do not move the quilt bundle; you will have to move the bundle as the machine is stitching. Whatever the stitch length you have the machine set on doesn’t matter because it is not functioning when the feed dogs are lowered.
 GOOD HABITS:
This is one of the tiny details that impact the machine’s ability to make the perfectly formed stitches that we desire. Consider adjusting the following settings before you stitch. With some newer machines, the owner’s manual will instruct you to set the stitch length setting to zero. When I have asked several machine manufacturers if I should do that on all machines, I was told that on some machines it did not have any consequence with the feed dogs lowered. Check your dealer or owner’s manual to find out the specifics for your machine(s).
Always do set the stitch width setting on zero. You want the machine to sew an absolutely straight line of stitches.

You will control the length of each stitch as well as the direction of the stitching line by moving the bundle with your hands. Stitching can occur in any direction and in straight or curved lines. You will move the quilt bundle as the machine stitches to produce lines of stitching that form designs on the fabric, just like a pen on paper.
 I used the formal style or follow-the-marked-line free-motion quilting to stitch this table runner. The pattern was marked on the fabric with a water-soluble marker that washed away after the quilt was stitched.
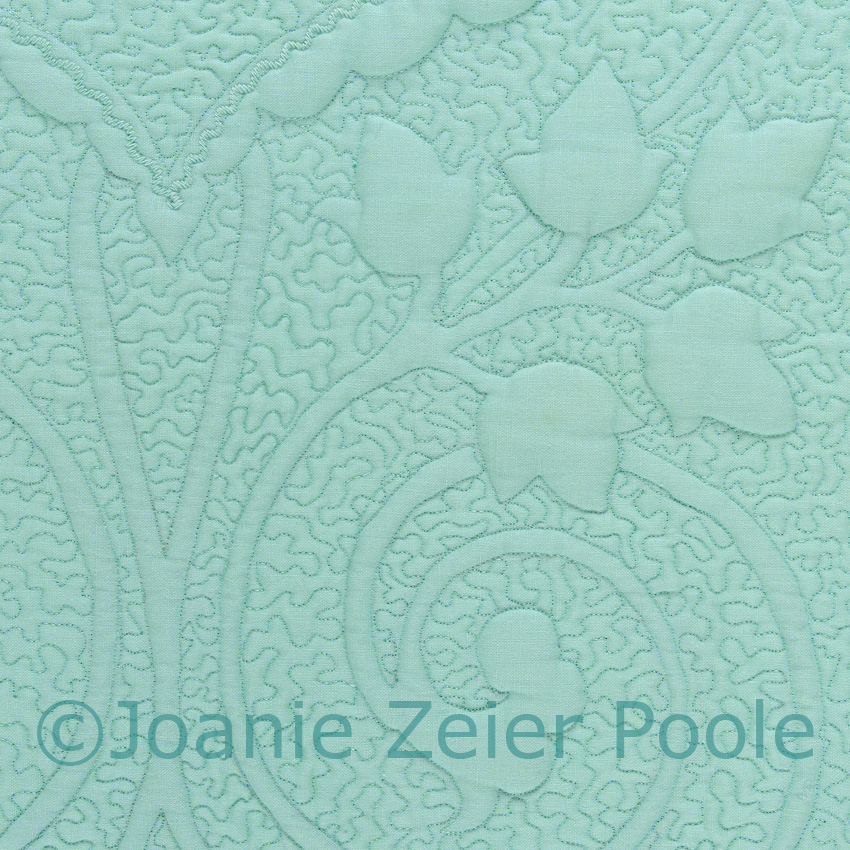 You can no longer see the marked line that has been washed away but this detail photo shows how the line of thread would follow the outlines the motifs in the identical manner that I used when I drew the original artwork with pencil on paper.
When you drop the feed dogs…
You must learn to coordinate the speed your foot is telling the machine to stitch with the speed your hands are moving the bundle to create smooth movements to achieve a consistent stitch length.
Remember too, when the feed dogs are lowered, the quilt does not have to be rotated when you want to change direction. The entire quilt could be oriented North for the entire process and never rotated. This can be a big advantage to the process depending on the size of the quilt bundle.
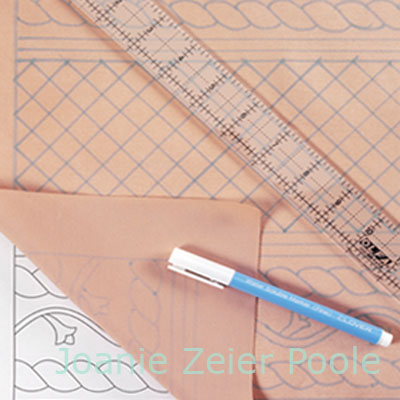 Here you see a water-soluble marker that I use to mark all of my quilts (unless the fabric prevents me from seeing the blue line). We will learn more on marking in a later post, but the basic idea is to center the stabilized fabric on top of a design printed on paper and trace the outlines.
 Here you see the example quilt used for the anchoring lesson in the previous post on straight line stitching. For this project, all stitching lines were traced on the fabric before the layers were pin basted. The first stitching was the anchoring on the straight lines, next the motifs were stitched with follow the marked line free-motion quilting.
The last stitching that occurred on this piece was the fill pattern that is referred to as stippling. I used free-hand free-motion quilting, which is the topic for my next post. Thanks for joining me for this blog post. I sincerely appreciate your interest in learning some of the hints I have included to make you more comfortable with this technique. I know this is just an introduction, but if you give it a try and if find this helpful let me know.
Quick Hints:
I will end with a myth busting Quick Hint. This very simple advice could be just what you need to hear if your free-motion quilting is not as accurate as you would like. Slow down. Place each stitch exactly where you want it. Whoever said that good machine quilting has to be done fast might have been trying to sell you a machine that was manufactured to stitch at a billion stitches per minute. This is like driving a car or preforming anything with accuracy, slow the movement of your hands while maintaining the steady speed of the machine. With more stitches, smaller stitches, occupying the same amount of space,you will achieve tiny curves, accurately follow a marked line or the seams of patchwork.
Til next Sunday, Have a productive week,
Joanie
![]() Read more About Joanie, her Career Highlights, or print Joanie’s Short Bio.
Read more About Joanie, her Career Highlights, or print Joanie’s Short Bio.
Can’t wait for a blog post of all of this advice? Explore helpful info already on the website: Glossary of Frequently used Machine Quilting Terms, How to Prepare for a Class, Quick Start Guide to Marking and Resizing Quilting Designs, Printable Charts for Quilting Facts, The Tips Page, and announcements of Upcoming Events.

I will be teaching at this event, come join me!
![]() Never miss an issue of this free e-zine, Joanie’s Life Changing Machine Quilting Lessons. Just watch for reminders from Joanie on her Facebook page or to receive a reminder sent to your inbox, use the sign-up form at the top of the sidebar on this page.
Never miss an issue of this free e-zine, Joanie’s Life Changing Machine Quilting Lessons. Just watch for reminders from Joanie on her Facebook page or to receive a reminder sent to your inbox, use the sign-up form at the top of the sidebar on this page.
If you feel you friends, family or quilt guild would benefit from this insight please invite them to join. I’d really appreciate it!
 The information, illustrations and photographs on this blog copyright Joanie Zeier Poole unless otherwise noted. No reproduction in any form is permitted without permission. All rights reserved. Please ask permission for using any content and give credit when sharing what you have learned. Heirloom Quilting Designs was founded by Joanie Zeier Poole in 2000, a new millennium with a new dream for the future!