Today’s post will help clear up some confusion that I often encounter when meeting the quilting public concerning the terms used when referring to the different techniques achieved when machine quilting with a home sewing machine. Teaching at guilds across the county, I meet quilters who have been quilting for their entire life, others are new to this vast and diverse world of quilting. Newcomers observe the production of wonderful quilt tops that will be completed by hiring a longarm quilter: (Please don’t get me wrong, I have nothing against that decision, the availability of longarm industry has meant the completion of more tops than anyone can count and provides an income for the longarm quilter’s families in a business they love) a percentage of successful machine quilters using their home sewing machine, others who are afraid of ruining their tops trying it and seldom is even a mention of tied quilts.
While you know that it is surely possible to use a regular machine to quilt the layers together, you may wonder how to use your equipment and attachments to get varying results. Your choices are to quilt with either a walking foot, or use the free-motion technique in two different ways. Over the next three posts we will examine how to set up your machine when using different attachments for different techniques. I will share when to use each technique and any cautions for their use.
 |
 |
Machine Quilting with a Walking Foot
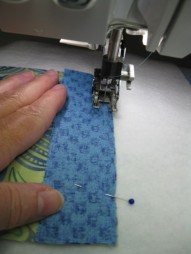
Straight line machine quilting is often accomplished with a walking foot installed and the feed dogs up and engaged. The foot moves in a walking motion, (thus the name) working together with the feed dogs to advance all three layers at the same time, avoiding puckers.
Stitching with the feed dogs up has the advantage of having a consistent stitch length. You may think “GREAT! Sounds like a lot of control without any puckers, I’ll always use a walking foot“. Many people have used this method to complete all of their quilts and never add free-motion to their skills.
*Historical Note: Machine Quilting may not be as recent as you think; research the work of Ernest B. Haight, a prolific early pioneer of machine quilting. His book, Practical Machine-Quilting for the Homemaker, published about a half century ago was available for $1.00 including postage!
However, keep in mind, when the feed dogs are up and engaged, each time you need to turn a corner, the entire quilt bundle must be rotated. This can be a huge consequence when the quilt is large and has to be persuaded through the small opening of the machine head.
What are some things that can be done with a walking foot
Straight line stitching with a walking foot is often referred to as functional quilting, look at these examples of straight line quilting to see why it got that name.
Anchoring the quilt – permanent stitches that hold the layers creating large work zones to add more quilting in later.
 This table mat for playing checkers or chess, was anchored with stitch-in-the-ditch quilting along the narrow black border and around the outer edge of the quilt. Next, the lines that form the checkerboard grid were stitched, evenly distributing the quilting throughout the quilt surface in a logical order.
 This utilitarian quilt show the Stitch-in-the-ditch technique – straight line quilting follows the seams of patchwork and borders, accentuating the graphic impact of the geometric pattern.
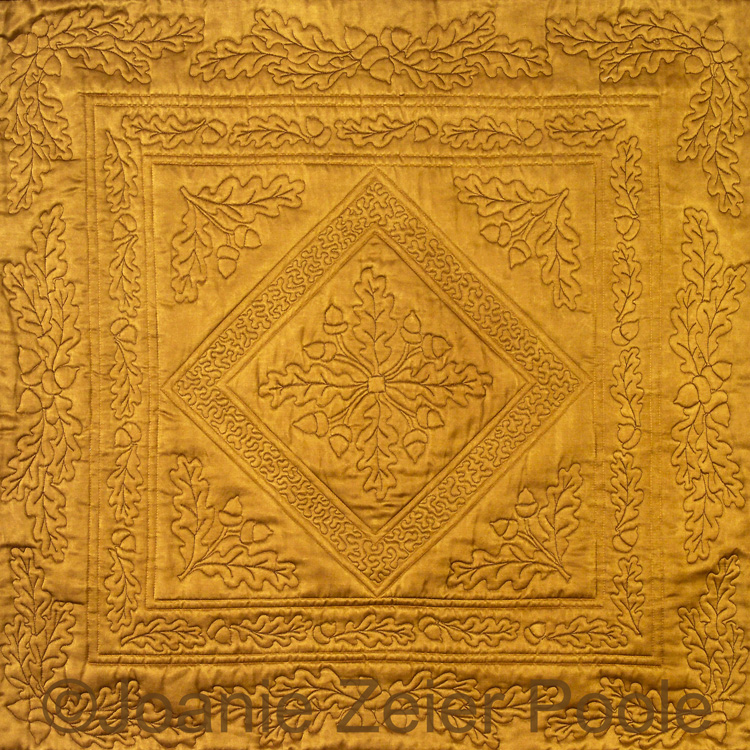 This is a small wholecloth sample quilt from my Oak Leaf and Acorn Quilting Design Collection had the pattern marked on the fabric and then the straight “anchoring” lines were stitched with a walking foot before the free-motion motifs were added.
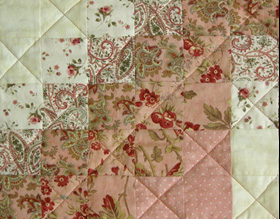 Straight lines form a Diagonal Grids used to fill entire quilt surface over patchwork. This is the idea Earnest used to complete hundreds of quilts.
 Simple straight line Channels form a versatile fill pattern that is appropriate for elegant or the most simple layout.
 A walking foot was used to stitch the gently curved lines of this double line grid.
 |
 |
The walking foot worked perfectly when quilting through multiple layers for a Quilt-as-you-go project from my book, The Complete Guide to Machine Quilting, 2012, St. Martin’s Press.
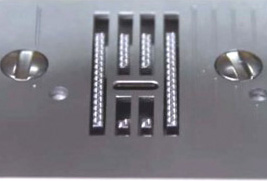
Setting up your sewing machine for quilting using a walking foot
Remove the regular presser foot and install the walking foot that accompanied or was purchased especially for your specific model. Check that the arm on the side, the needle screw clamp, gets connected to the screw. Make sure the feed dogs are up. Choose the stitch length appropriate for the weight of thread which is chosen for the purpose of the project and adjust the stitch length regulator for that setting. Baste the layers of your project and that’s it, you are ready to stitch! 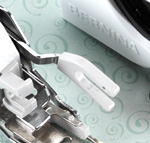
Next UP! Three Terrific Machine Quilting Techniques –
Free-Motion – Formal
Good Habits: Always make plan to eliminate bulk when assembling each patchwork block, the row of blocks and sewing those into a quilt top. Often I suggest that the block seams be pressed open to evenly distribute the layers of fabric, avoiding a mountain of seams that will distort your stitching consistency. However, for long borders strips that will be stitched in the ditch, press those seams toward the outside of the quilt. That way you will have a low side of the ditch in which to guide the needle.
![]() Read more About Joanie, her Career Highlights, or print Joanie’s Short Bio.
Read more About Joanie, her Career Highlights, or print Joanie’s Short Bio.
Can’t wait for a blog post of all of this advice? Explore helpful info already on the website: Glossary of Frequently used Machine Quilting Terms, How to Prepare for a Class, Quick Start Guide to Marking and Resizing Quilting Designs, Printable Charts for Quilting Facts, The Tips Page, and announcements of Upcoming Events.
![]() Never miss an issue of this free e-zine, Joanie’s Life Changing Machine Quilting Lessons. Just watch for reminders from Joanie on her Facebook page or to receive a reminder sent to your inbox, use the sign-up form at the top of the sidebar on this page.
Never miss an issue of this free e-zine, Joanie’s Life Changing Machine Quilting Lessons. Just watch for reminders from Joanie on her Facebook page or to receive a reminder sent to your inbox, use the sign-up form at the top of the sidebar on this page.
If you feel you friends, family or quilt guild would benefit from this insight please invite them to join. I’d really appreciate it!